In the world of Java web development, having a properly configured environment is the first step toward successful deployment and scalability.
By combining Apache Tomcat as a lightweight web application server with the stability and performance of a Linux VPS, developers can achieve a fast, secure, and reliable setup for their web projects.
This guide walks you through installing Java, setting up Tomcat, deploying applications, and securing your environment — with a full comparison of Tomcat vs. other Java servers.
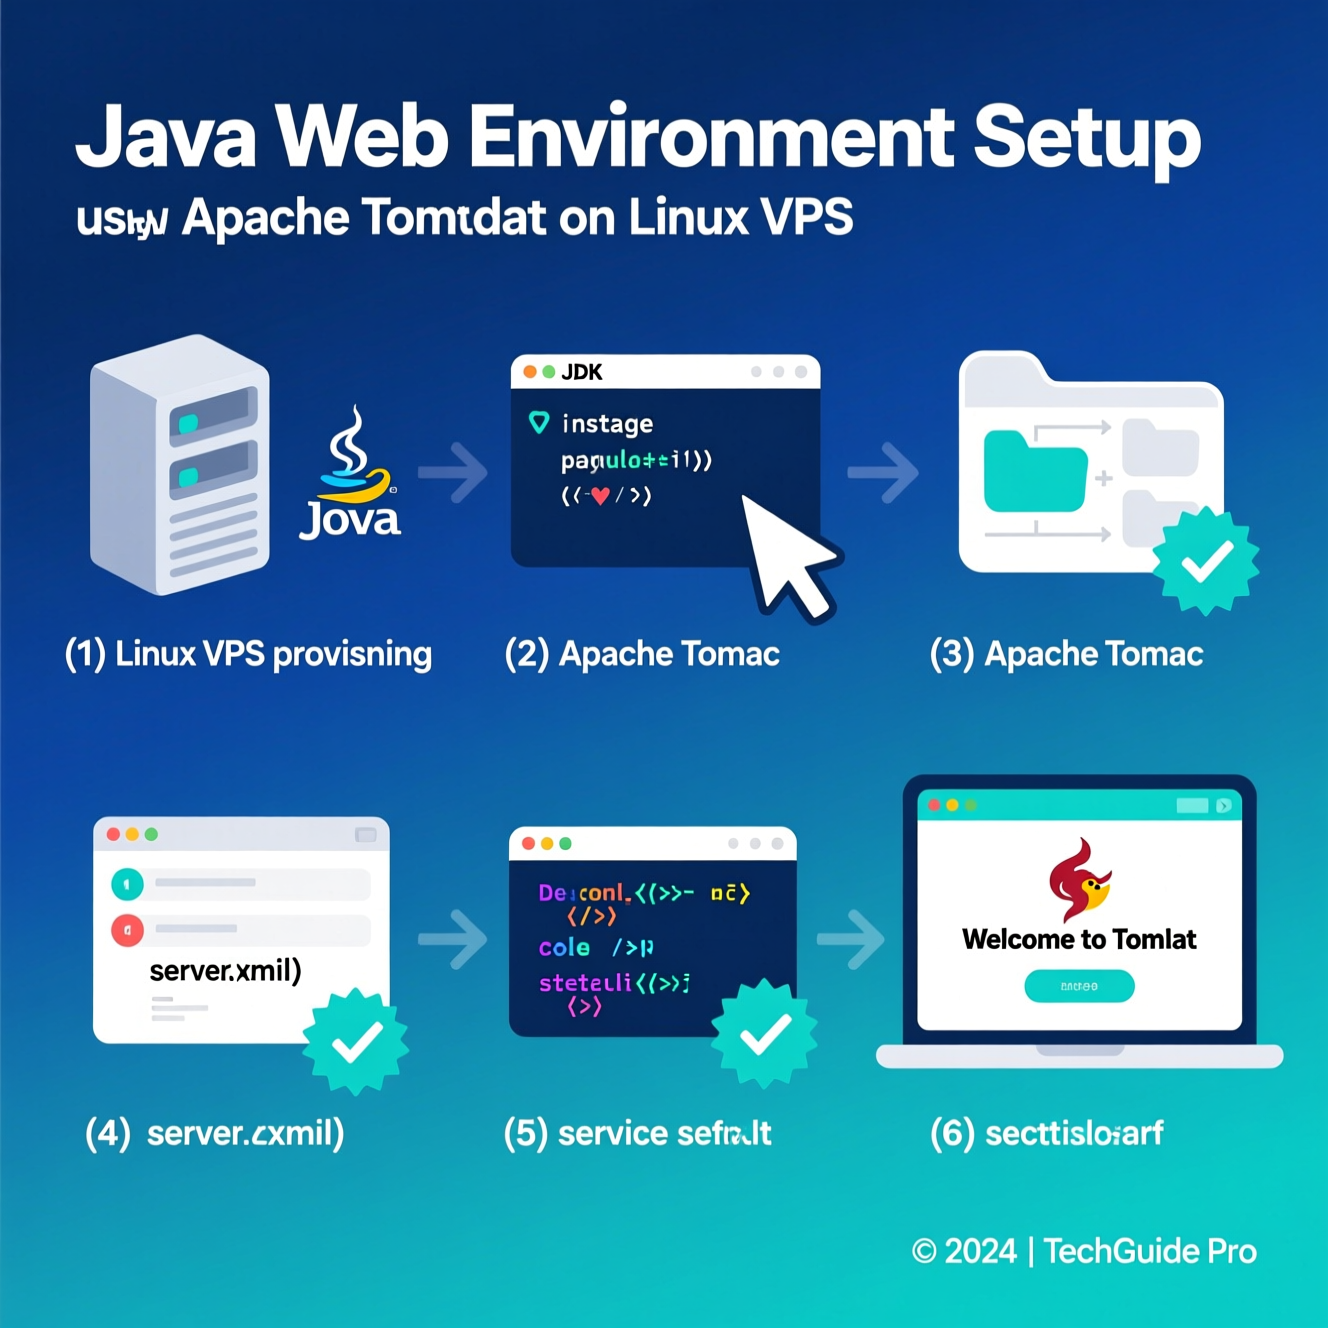
Before building or running any Java web applications, you need to install JDK:
Download the latest JDK from Oracle or open-source versions like OpenJDK (Temurin).
Verify the installation:
Set the JAVA_HOME environment variable to your JDK installation directory.
Popular Integrated Development Environments (IDEs) for Java include:
IntelliJ IDEA – robust and intelligent environment.
Eclipse – open-source and ideal for large projects.
NetBeans – simple and perfect for learning or mid-size apps.
Use build automation tools to simplify dependency management:
Maven
Gradle
These tools handle project structure, build cycles, and deployments efficiently.
Copy your .war file to the Tomcat webapps directory:
Restart Tomcat:
Access your app in the browser:
Tomcat automatically extracts and deploys the WAR file upon startup.
Follow these best practices to harden your Tomcat installation:
Run Tomcat as a non-root user.
Remove default apps (docs, examples).
Disable unused ports (like shutdown port 8005).
Enable HTTPS using SSL certificates.
Disable TRACE requests.
Update Tomcat and Java regularly.
Turn off auto-deploy to prevent unauthorized uploads.
| Feature | Apache Tomcat | WildFly (JBoss) | GlassFish |
|---|---|---|---|
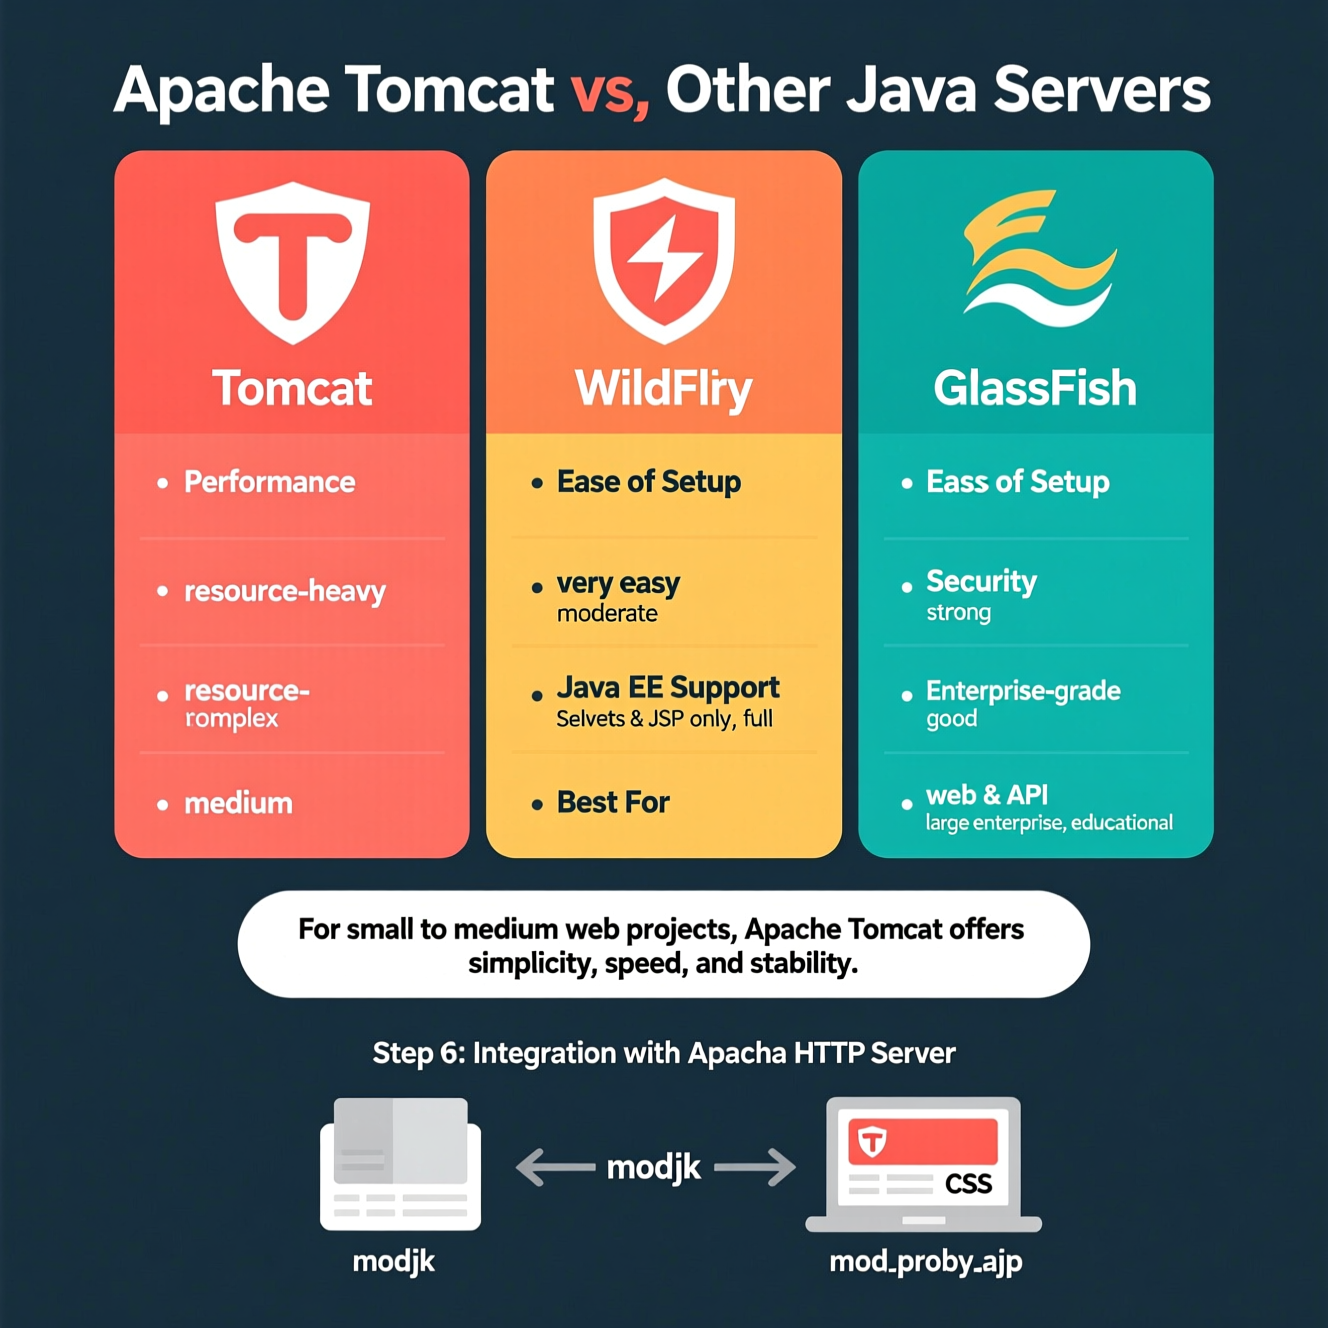
| Performance | Lightweight and fast for web apps | Powerful but resource-heavy | Medium performance |
| Ease of Setup | Very easy | Moderate | Complex |
| Java EE Support | Servlets & JSP only | Full Java EE | Full Java EE |
| Security | Strong, easy to harden | Enterprise-grade | Good |
| Best For | Web & API projects | Large enterprise apps | Educational use |
Conclusion:
For small to medium web projects, Apache Tomcat offers simplicity, speed, and stability.
For enterprise-scale systems, WildFly or GlassFish might be better suited.
To enhance performance, you can integrate Tomcat with Apache HTTP Server using:
mod_jk
mod_proxy_ajp
This setup allows Apache to handle static files while Tomcat focuses on dynamic Java content — improving load times and efficiency.
Edit the file:
Change the HTTP connector port:
Disable the shutdown port:
With EgyVPS Linux VPS, deploying Java web applications becomes effortless:
Preconfigured JDK + Tomcat setup.
Optimized performance for Java workloads.
Expert technical support.
Secure and scalable infrastructure.
Start your next Java project with EgyVPS and enjoy smooth, secure hosting built for developers. ⚡
An open-source web server for running Java Servlets and JSP-based applications.
Yes, via the official Windows installer (.exe).
Copy your WAR file to the webapps/ folder and restart Tomcat — it auto-deploys.
Use HTTPS, disable unused ports, remove default apps, and keep everything updated.
Because it’s lightweight, easy to configure, and ideal for Java web development.
هل تحتاج إلى Windows VPS سريع وآمن وبسعر مناسب؟
شركة EgyVPS بتوفرلك سيرفرات ويندوز جاهزة للاستخدام فورًا.
? تواصل معنا عبر: 201001197157
? أو زور موقعنا: https://egyvps.com
") United Arab Emirates (Arabic)
United Arab Emirates (Arabic)") Worldwide (English)
Worldwide (English)